Bryan Couch, DDS
Even with all the technological advances in dentistry, the ability of the dentist to perform chairside is still paramount in delivering the best possible dental care. However, at times, clinicians may overlook the simplest advances that can dramatically improve performance and patient care. The field of dental burs and diamonds is one such arena. Selecting the correct dental burs is one of the most important steps for a dentist building his or her armamentarium.
Today, with the rise of digital dentistry and CAD/CAM technology, it can be easy to overlook a tool as simple as a bur for something with all the bells and whistles of a digital scanner or milling system. But clinicians should note that when traditional tools and new technological innovations are combined, the best patient care is provided.
For years, my first choice for dental burs has been the Premier Two Striper® (www.premusa.com). Additionally, the Solo™ diamond is a great choice for single purpose use. When the excellence of these diamonds is combined with the digital capabilities of a CAD/CAM system, such as the Planmeca FIT™ Open CAD/CAM System (planmecacadcam.com)—with whom Premier has an exclusive relationship—the level of dentistry being provided to patients is dramatically improved.
The purpose of this article is to provide examples of tooth preparation, design, and restoration fabrication with Premier burs in situations requiring digital milling or intraoral restorative work.
The Systematic Approach
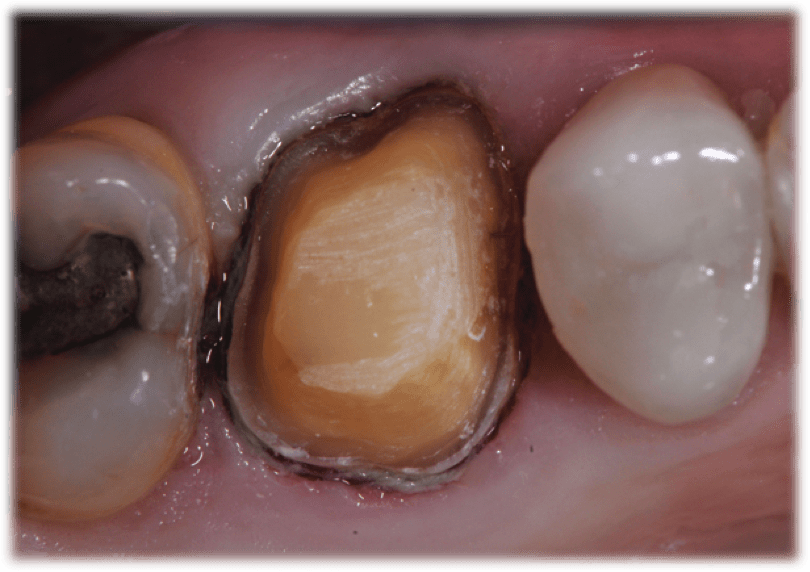
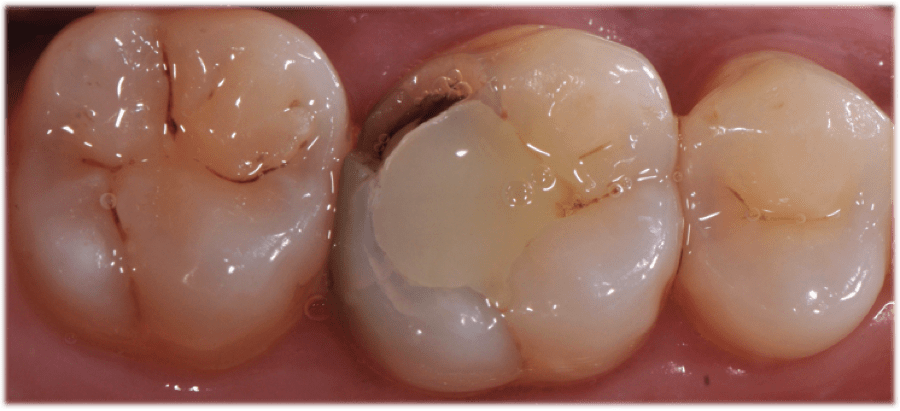
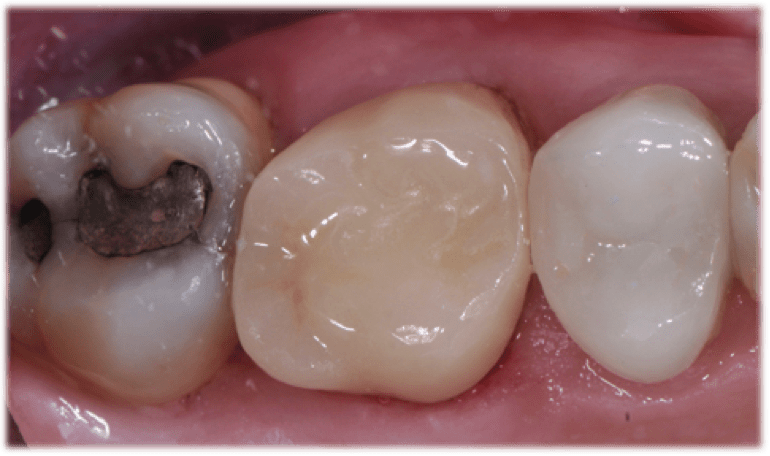
Taking a systematic approach to bur selection will streamline the chairside experience for the practitioner and the patient. In this case, I am prepping tooth No. 3 for a partial coverage restoration. It is a large filling with decay underneath. Whether it is partial (Figure 1) or full (Figure 2) coverage, preparation design should begin with the removal of the existing filling and any decay (Figure 3). This step is usually accomplished with the use of a Solo diamond double inverted cone. Once this step is complete, the clinician should either break contact with a flame or begin occlusal reduction with the football diamond. The preparation may require a build-up material to idealize the shape after the general form has been completed.
The preparation margins are then finished per the dental designer’s preference, which involves using burs and diamonds. The primary goal in bur selection is to choose a dependable, well-made, sterile, and predictable bur that will accomplish the best preparation. I prefer to use a shoulder preparation with a flat end taper, such as the Solo course grit 837012C or 837016C. The 12C and 16C signifies the diameter of the bur and is a useful tool in determining the amount of tooth reduction made on the axial walls. However, different clinical situations may require different burs, so dental designers should not limit themselves to one particular model or line.
It should be noted that Premier’s KR Modified Shoulder prep burs allow for a 90° margin with a rounded internal angle. This combination of burs allows me to prepare crowns, inlays, or onlays, and serves as my first choice for a restorative bur block. After tooth preparation is complete, the dentist must address whether retraction is needed. Clinicians can either place a retraction cord or use a paste retraction system like Traxodent® Hemodent™. Typically, I use both retraction cord and Traxodent, which better isolates the preparation for scanning and designing a CAD/CAM milled restoration. It also isolates the tooth for same day seating of the restoration, keeps the area clean before the procedure, and assists in a fast, easy cleanup of bonding materials.
I create same-day restorations using the Planmeca PlanMillTM 40 to produce a precise, smooth and well fitting restoration (Figure 4). Once the restoration is milled and tried in the patient’s mouth, the Two Striper finishing kit allows for the clinician to make any desired finishing touches (Figure 5 and Figure 6). For in-mouth finishing, I prefer to use Solo diamond finishing burs. If minor adjustments are required, the Premier Diamond Twist extraoral polishing system can also be utilized prior to cementation.
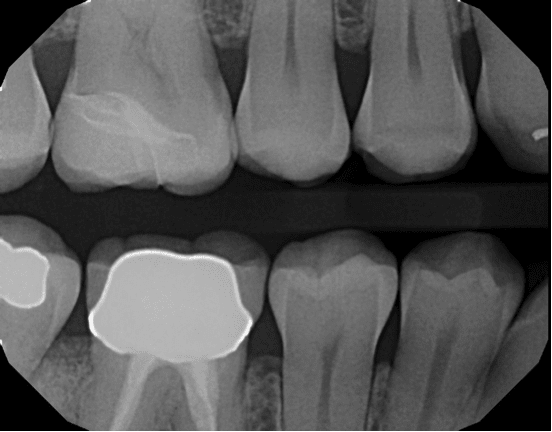
In this case, patient radiographs (Figure 7 and Figure 8) demonstrate a well-fitting CAD/CAM restoration that began with proper preparation design using the Solo diamond and efficient milling with the PlanMill 40. These tools can help clinicians provide ideal chairside tooth preparation, digital impressioning, and CAD/CAM milling, to ultimately deliver restorations of the highest quality.
About the Author
Bryan Couch, DDS, has practiced dentistry in Coppell, Texas, since 1985. He has lectured extensively on occlusion, as well as cosmetic and restorative dentistry.


